Are you struggling to keep your plants healthy and vibrant? While fertilizing your plants is important for their growth and development, too much of a good thing can be harmful. Over-fertilization can cause a range of problems for your plants, from yellowing leaves to dying roots. But don’t worry, there are steps you can take to treat over-fertilized plants and prevent it from happening again in the future.
This article will provide you with tips and tricks on how to recognize the signs of over-fertilization, how to treat over-fertilized plants step-by-step, and ways to prevent it from happening in the first place. Let’s dive in and rescue those struggling plants!
Signs of Over Fertilization
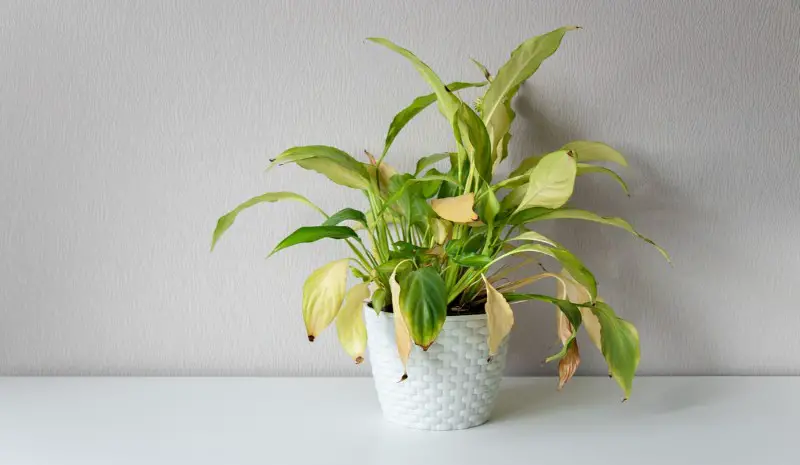
Over-fertilization is a common problem that can affect even experienced gardeners. It occurs when too much fertilizer is applied to plants, which can lead to a range of issues. One of the signs of over-fertilization is yellowing leaves, which can occur when plants receive too much nitrogen.
Brown and dying roots are also a clear indication that the plant is struggling to absorb nutrients due to too much fertilizer. Burnt or crisp leaves are another sign, as the excess fertilizer can cause the leaves to dry out. Finally, wilting plants can be a sign of over-fertilization, as the excess nutrients can disrupt the water balance in the plant. Keeping an eye out for these signs can help you address the issue before it’s too late.
Yellowing Leaves
Yellowing leaves are a clear indication that your plant may be suffering from over-fertilization, specifically due to too much nitrogen. Nitrogen is a key nutrient that promotes leafy green growth, but too much of it can cause the leaves to turn yellow. In severe cases, the leaves may even drop off entirely. To address yellowing leaves, the first step is to stop fertilizing your plant.
Next, you’ll want to flush the soil with water to remove excess nutrients. This can be done by giving the plant a good soaking, letting the water drain through the soil completely, and then repeating the process a few more times. It’s important to note that yellowing leaves can also be caused by other factors, such as pests, disease, or lack of sunlight. It’s always a good idea to inspect your plant thoroughly to rule out these possibilities before assuming it’s due to over-fertilization.
Additionally, take note of the type of fertilizer you’re using and its recommended application rate. Using too much or applying it too frequently can lead to the yellowing of leaves. With proper care, your plant can recover from over-fertilization and get back to thriving.
If you’re interested in learning about the best fertilizer for citrus trees, we have a fantastic article on our blog that you won’t want to miss! Discover valuable insights and expert recommendations on how to nurture your citrus trees to thrive and yield a bumper crop. Head over to our blog post titled ‘Best Fertilizer for Citrus Trees‘ to uncover the secrets to promoting healthy growth and bountiful fruit production in your citrus orchard.
Brown and Dying Roots
Brown and dying roots are a clear indicator that a plant has been over-fertilized. Excess fertilizer can cause a build-up of salts in the soil, which can be toxic to plant roots. Plants may also experience “fertilizer burn,” where the roots are literally burned by high levels of fertilizer. Here are a few steps you can take to treat a plant with brown and dying roots:
- Remove the affected soil: If you notice brown and dying roots, you may need to repot the plant and remove the affected soil. This will help prevent further damage to the plant.
- Flush the soil: Thoroughly rinse the plant’s soil with plain water to remove excess fertilizer and salts. Allow the water to drain out of the pot completely before returning it to its normal location.
- Treat with a root stimulator: You can treat the plant with a root stimulator to help the roots recover. Focus on using natural and organic methods to help the plant heal.
- Provide proper care: Once you’ve addressed the excess fertilizer issue, make sure that you’re providing your plant with the proper care it needs to regain its health. This may include regular watering, proper lighting conditions, and pruning as needed.
Remember, it’s always better to fertilize your plants conservatively to prevent these issues. If you notice brown and dying roots, take immediate action to help your plant recover and prevent further damage.
Burnt or Crisp Leaves
Burnt or crisp leaves are a possible sign that your plants are suffering from over-fertilization. When too much fertilizer is applied, the plant may not be able to absorb all the nutrients, causing the salts to accumulate in the soil. As a result, the tips and edges of the leaves can become brown, burnt, or crispy. This is particularly common in plants that do not need a lot of nutrients, such as cacti or succulents.
To confirm if this is the issue, gently touch the leaves of the plant. If they are brittle and break easily or feel dry and papery rather than plump and firm, this may be a sign of burnt or crispy leaves due to over-fertilization. To treat the issue, you’ll need to flush the soil with water to remove any excess salts. In severe cases, it may be necessary to repot the plant into fresh soil.
During the repotting process, carefully remove any affected leaves and roots, which may have also been damaged by the excess salts. After repotting, avoid fertilizing the plant for a few months or switch to a low-nutrient formula to prevent over-fertilization from happening again. To prevent burnt or crispy leaves from occurring, it’s important to fertilize your plants properly.
Be sure to read and follow instructions carefully, using the recommended amount of fertilizer for your plant’s specific needs. Consider using organic fertilizers, which release nutrients more slowly and are less likely to cause a buildup of salts.
Finally, monitor the soil regularly to ensure the nutrient levels are not too high. Adjust the frequency and amount of your fertilizer applications according to the needs of your plant and the condition of the soil.
Wilting Plants
Wilting plants are a clear indication that something is wrong. One of the causes of wilting plants can be over-fertilization. When plants receive too much fertilizer, it can disrupt the plant’s water balance, causing it to wilt. This can be due to a build-up of salt in the soil, which prevents the plant from absorbing water.
Excessive fertilizer can stimulate root growth, which can lead to overcrowding and a lack of oxygen in the soil. This can also cause wilting. To determine if your plant is wilting due to over-fertilization, check the soil for moisture levels. If the soil is moist but the plant is still wilting, it is likely due to over-fertilization. To treat over-fertilized plants that are wilting, flush the soil with water to remove excess salts.
Repotting the plant may also help, as this can provide fresh soil with the right balance of nutrients. Finally, monitor the plant carefully and adjust your fertilizing schedule to prevent over-fertilization from occurring again in the future.
Attention pet owners and gardening enthusiasts! If you’re looking for a safe and pet-friendly solution to tackle weeds in your garden, we invite you to check out our latest article on ‘Pet-Friendly Weed and Feed‘ Discover effective and environmentally conscious ways to maintain a beautiful garden while keeping your furry friends safe.
How to Treat Over-Fertilized Plants
If you’ve identified that your plants are suffering from over-fertilization, there are several steps you can take to help them recover.
Start by flushing the soil with water to remove excess nutrients. It’s important to use enough water to thoroughly rinse the soil. Repotting the plant can also help if the roots have been damaged by the excess fertilizer. Remove any affected leaves and roots to prevent further damage.
Finally, provide proper care to your plants, including regular watering and monitoring their growth and health. With patience and care, your plants should recover from over-fertilization.
Step 1: Flush with Water
The first step to treating over-fertilized plants is to flush the soil with water. This involves giving the plant thorough watering to help remove excess fertilizer from the soil. Here’s how to do it:
- Choose a container: Select a container that is large enough to hold your plant and has drainage holes. Fill the container with water.
- Gently remove the plant: Carefully remove the plant from its pot and gently rinse off any excess fertilizer from the roots.
- Soak the roots: Place the plant in the container of water and let it soak for about an hour. This will help to flush out any excess fertilizer from the soil.
- Drain and dry: After the hour is up, remove the plant from the container and let the excess water drain away. Allow the plant to dry for a few hours before repotting.
It’s important to note that you should only flush the plant with water once or twice to avoid damaging the roots. Overwatering can also be harmful to the plant, so be sure to allow the soil to dry out slightly before watering again.
Step 2: Repot
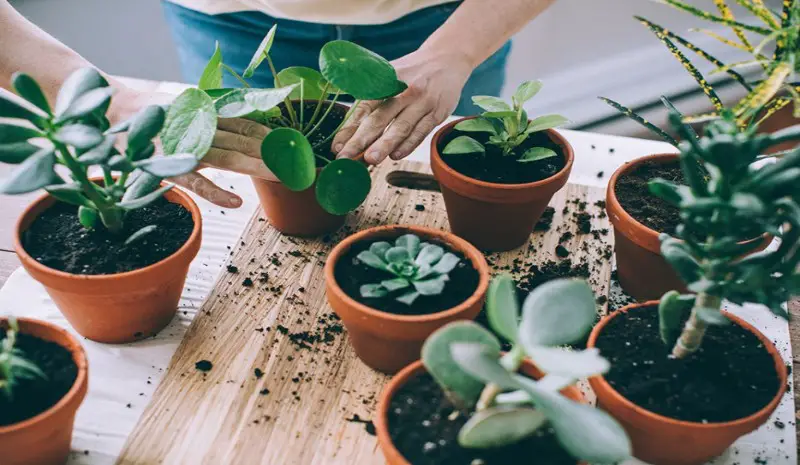
Report Sometimes flushing with water is not enough to save a plant that has been over-fertilized. In such cases, repotting the plant can be a good solution. This involves carefully removing the plant from its current pot and replanting it into a new pot with fresh soil. When repotting, be sure to gently remove as much old soil from the roots as possible to prevent the excess nutrients from continuing to affect the plant.
You can also trim back any damaged or affected roots. When selecting a new pot, choose one that is only slightly larger than the current pot, as plants do not need a lot of extra space, and a large pot can actually make it harder for the plant to absorb nutrients. The new pot should also have good drainage to prevent water from accumulating at the bottom and causing root rot.
Finally, fill the new pot with fresh soil that is appropriate for the plant’s needs, such as a well-draining potting mix. Repotting can be stressful for plants, so it’s important to monitor the plant carefully for the first few weeks after repotting to ensure that it is recovering well.
Step 3: Remove Affected Leaves and Roots
Removing affected leaves and roots is an important step in treating over-fertilized plants. These parts of the plant can no longer function properly and can attract pests or spread diseases if left unattended. Here are some tips on how to properly remove affected leaves and roots:
- Use clean, sharp scissors or pruning shears to make clean cuts.
- Trim the leaves and roots only up to the healthy tissue. Do not cut too close to the stem or main root to avoid injuring the plant further.
- Remove leaves that are yellowed, brown, or burned. These leaves are no longer photosynthesizing and will not recover.
- If a root is mushy or black in color, remove it completely. If only the tip of the root is affected, trim it back to healthy tissue.
- Dispose of the affected leaves and roots in a sealed bag or container to prevent the spread of any diseases or pests that may be present.
Remember to disinfect your scissors or shears after each cut to avoid spreading any diseases to other plants. This step is crucial in helping your plant recover from over-fertilization and can improve its overall health and growth.
Step 4: Provide Proper Care
Provide Proper Care After flushing with water, repotting, and removing affected leaves and roots, it’s important to provide your plants with the proper care to help them recover from over-fertilization. Here are some tips to ensure that your plants are healthy and happy:
- Adjust watering: Over-fertilized plants may have difficulty absorbing water, so it’s important to ensure they get just enough moisture. Check the soil regularly and only water when the top inch is dry, to avoid further stress.
- Use proper lighting: Be sure to provide your plants with the appropriate amount of sunlight for their species. Each plant has its own needs, from full sun to shade, so do your research and adjust accordingly.
- Keep humidity levels balanced: Many indoor plants require certain levels of humidity to thrive. You can use a humidifier or place a tray of water near the plants to help regulate moisture levels.
- Don’t fertilize too often: Once your plant has recovered, be sure to follow the recommended fertilizing schedule to prevent over-fertilization from happening in the future. By providing the proper care, you can help your plants recover and thrive. Keep a close eye on them and make adjustments as necessary to ensure they stay healthy and beautiful.
Tips and Tricks to Prevent Over Fertilization
Preventing over-fertilization is key to keeping your plants healthy and thriving. One of the top tips is to read and follow instructions carefully when applying fertilizer.
Using organic fertilizers can also help prevent over-fertilization, as they release nutrients slowly and are less likely to build up in the soil. Monitoring the soil regularly for nutrient levels can help you understand when and how much fertilizer to apply. Fertilizing according to plant needs is also important, as different plants have varying nutrient requirements.
Additionally, considering the type and quality of soil can greatly affect how much fertilizer is required. By following these tips, you can help prevent over-fertilization and provide your plants with the right amount of nutrients for optimal growth.
Read and Follow the Instructions
When fertilizing plants, it’s crucial to read and follow instructions carefully to prevent over-fertilization. Every fertilizer is different, and the amount and frequency of application will vary depending on the type of plant and the soil condition. It’s important not to assume that more fertilizer is better, as excess nutrients can harm the plant. Always follow the recommended dosage on the label, and avoid applying more than instructed.
Additionally, it’s crucial to use the right type of fertilizer for your plant’s needs. Organic fertilizers are a great choice, as they release nutrients slowly over time and don’t risk overfeeding the plant. Reading and following instructions is a key element in preventing over-fertilization and ensuring the health and vitality of your plants.
Use Organic Fertilizers
When it comes to fertilizers, a great way to avoid over-fertilization is to use organic options. Organic fertilizers are made from natural ingredients, so they release nutrients slowly over time, providing a steady source of nourishment for your plants. Here are some benefits of using organic fertilizers:
- Slow-release: Unlike synthetic fertilizers, organic options release nutrients gradually over time, which makes it less likely to cause over-fertilization.
- Improves soil health: Organic fertilizers help to improve the quality of soil by introducing beneficial microorganisms, which feed on organic matter and convert it into nutrients that plants can use for growth.
- Reduces pollution: Synthetic fertilizers can pollute water sources and harm wildlife. Organic options, on the other hand, are less harmful to the environment.
- Cost-effective: While synthetic fertilizers may be cheaper, the long-term benefits of organic options can save you money in the long run by reducing the amount of fertilizer needed over time.
There are a variety of organic fertilizers available, including compost, bone meal, fish emulsion, and seaweed. These options may take longer to show results than synthetic fertilizers, but they are much gentler on your plants and on the environment.
Always read the instructions carefully to ensure you are using the right amount for your plants, and monitor the soil regularly to avoid over-fertilization. Using organic fertilizers is a simple and effective way to keep your plants healthy and nourished while avoiding the drawbacks of chemical fertilizers.
Monitor Soil for Nutrient Levels

Monitoring the soil for nutrient levels is an essential step in preventing over-fertilization in plants. Before applying fertilizer, it’s important to test the soil and determine which nutrients are needed. You can use soil test kits available at garden centers and online retailers to assess the nutrient levels in your soil.
These kits will give you information on essential nutrients such as nitrogen, phosphorus, and potassium as well as other micronutrients like iron and magnesium. By knowing what nutrients are already present in the soil, you can avoid applying too much fertilizer, which can lead to over-fertilization.
Additionally, different plants require different nutrient levels, so soil monitoring allows you to tailor your fertilization to the specific needs of each plant. If you find that your soil is deficient in essential nutrients, you can then apply the appropriate fertilizer and avoid adding excess nutrients to your plants. Remember, over-fertilization can damage your plants and lead to a multitude of problems, so taking the time to monitor soil nutrient levels is a crucial step in plant care.
Fertilize According to Plant Needs
- Determine what your plants need: Different plants have different nutrient requirements. Before fertilizing, research what your specific plants need to thrive. This will prevent over-fertilization and ensure your plants are getting the right nutrients.
- Use soil tests: Soil tests can help determine what nutrients your soil lacks. Test your soil regularly to prevent over-fertilization. You can purchase soil test kits at most gardening stores or submit a sample to a lab for more accurate results.
- Choose the right fertilizer: Once you know the nutrients your plant needs, choose a fertilizer that matches those needs. There are many types of fertilizers available, including organic and synthetic options. Organic fertilizers release nutrients slowly and are less likely to cause over-fertilization than synthetic options.
- Follow instructions: Make sure to read the label and follow the recommended rates of application. Over-fertilization often occurs when gardeners apply more fertilizer than the label recommends, thinking it will yield better results. This is not true and will do more harm than good.
- Fertilize at the right time: Fertilize your plants when they need it most. For some plants, this may be in the spring when they are actively growing, while others may benefit from fertilizer in the fall to promote root growth.
- Adjust as needed: Remember that the needs of your plants may change over time. Adjust your fertilization schedule and amounts if you notice signs of over-fertilization or under-fertilization.
Attention all strawberry enthusiasts and gardeners! If you’re looking to achieve a bountiful harvest of delicious strawberries, we have just the article for you. Discover the secrets to growing better yields with our guide on the ‘Best Fertilizer for Strawberries: 6 Products to Grow Better Yield‘
Conclusion
In conclusion, over-fertilization is a common issue that can lead to a range of problems for your plants. It’s important to recognize the signs of over-fertilization and take action to address the issue before it causes irreversible damage. The steps to treat over-fertilized plants include flushing excess nutrients out of the soil, repotting the plant, removing damaged leaves and roots, and providing proper care moving forward.
Additionally, following tips and tricks to prevent over-fertilization, such as reading and following instructions, using organic fertilizers, and monitoring soil nutrient levels, can help keep your plants healthy and thriving. By paying attention to your plants and taking action when needed, you can avoid the negative effects of over-fertilization and enjoy a beautiful, flourishing garden.
Frequently Asked Questions
What are the symptoms of over-fertilization?
The symptoms of over-fertilization include yellowing leaves, brown and dying roots, burnt or crisp leaves, and wilting plants.
How do I know if my plant needs fertilizer?
Check the soil for nutrient levels and look for signs of stunted growth or pale leaves.
Can over-fertilization be deadly for plants?
Yes, over-fertilization can cause serious harm to your plants and even kill them.
How can I flush out excess fertilizer from the soil?
You can flush excess fertilizer from the soil by watering the plant with plenty of clean water until the water runs clear from the pot’s drainage holes.
Should I repot a plant that has been over-fertilized?
Yes, repotting can help prevent further damage by replacing the affected soil with fresh, nutrient-rich soil.
What types of fertilizers are best for plants?
Organic fertilizers are a great option for plants as they release nutrients slowly and improve soil structure over time.
Can I fertilize a plant too little?
Yes, plants need a certain amount of nutrients to thrive. Fertilizing too little can lead to poor growth and nutrient deficiencies.
Should I follow the fertilizer instructions on the package?
Yes, it’s important to follow the instructions to ensure you’re applying the right amount of fertilizer to your plants.
Can over-watering mimic the symptoms of over-fertilization?
Yes, over-watering can cause similar symptoms to over-fertilization, such as yellowing leaves and wilting.
How do I prevent over-fertilization in the future?
You can prevent over-fertilization by reading and following instructions, using organic fertilizers, monitoring soil nutrient levels, and fertilizing according to your plant’s needs.