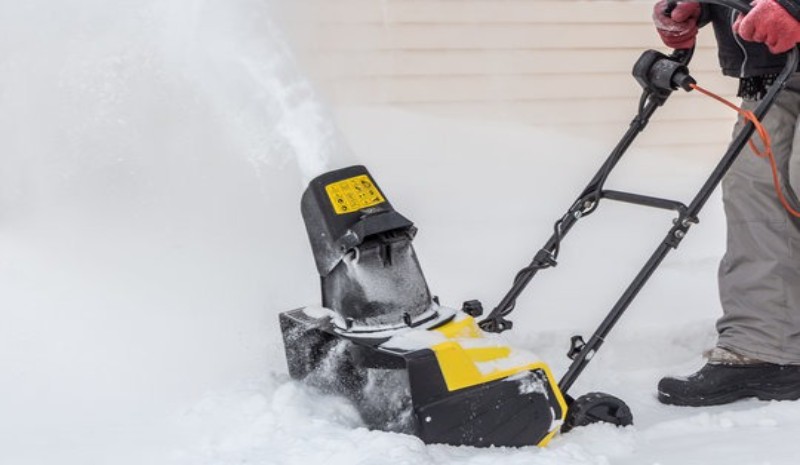
Winter can be harsh, and a reliable snow blower is a must-have piece of equipment to make your life easier during heavy snowfall. However, after a season of use, your snow blower might be covered in dirt and other debris, and its carburetor might be clogged with residue that can impede its functionality. It is essential to clean your snow blower’s carburetor regularly to keep it running smoothly.
But, where do you start? This step-by-step guide will help you learn how to clean a snow blower carburetor and get back to clearing snow from your pathways without any hassle.
What You’ll Need
Before starting the process of cleaning a snow blower carburetor, make sure to have all the essential materials and tools on hand. Here is a list of what you’ll need for the job: First and foremost, make sure to wear gloves and safety glasses to avoid any accidents. Then, you’ll need a carburetor cleaner/aerosol to clean off the debris and residue effectively.
A set of screwdrivers, a wrench, and a ratchet will come in handy while disassembling the carburetor. Make sure to have a clean and dry workspace to avoid contamination. By having all of these materials ready to go, you’ll be prepared and set to tackle the task of cleaning your snow blower carburetor.
Gloves and Safety Glasses
are a crucial part of any maintenance task requiring hands-on work. When dealing with the snow blower carburetor specifically, gloves are essential to protect your hands from sharp edges and pointed surfaces. Additionally, gloves will keep your hands safe from any dirt, debris, or chemicals you may come in contact with. It is imperative to wear gloves that are sturdy and snug enough to provide ample protection and allow for dexterous movements.
Safety glasses will also protect your eyes from dirt, debris, and chemicals that may fly up during the carburetor cleaning process. Even a tiny speck of dirt or debris can cause significant damage to your eyes, which is why wearing safety glasses is a no-brainer. They will keep your eyes safe and clean, and allow you to work on the carburetor with confidence. Remember, safety should always come first when working with any machinery, including snow blowers.
A Carburetor Cleaner/Aerosol
is an essential component that you’ll need to clean your snow blower carburetor. There are plenty of carburetor cleaners available in the market, and it can be confusing to choose the right one. Here are a few tips to help you make an informed decision:
- Always choose a carburetor cleaner that’s meant for snow blowers, and not for cars or motorcycles.
- Look for a cleaner that dissolves quickly and effectively without leaving any residue. Carburetor cleaners that leave residue can clog the carburetor, leading to more problems in the future.
- Using an aerosol can be an easy and efficient way to access and clean the carburetor. However, make sure to read the label carefully before use, and exercise caution to avoid splatters and spills.
- Some cleaners come with added lubricants that can help protect the carburetor in the long run. Look for cleaners that provide this added benefit.
By choosing the right carburetor cleaner/aerosol, you’ll ensure that your snow blower carburetor is cleaned thoroughly and that any potential damage is prevented.
Screwdrivers, Wrench, and a Ratchet
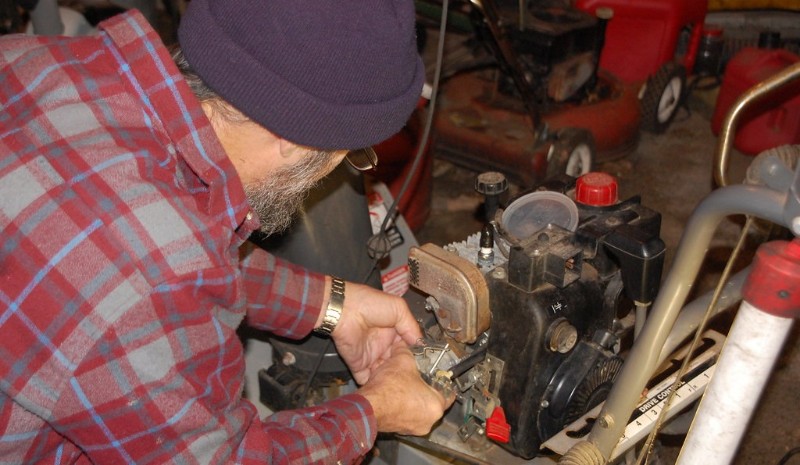
When it comes to cleaning a snow blower carburetor, having the right tools is crucial. You’ll need to have a set of screwdrivers, a wrench, and a ratchet on hand to help you disassemble and reassemble the carburetor. A screwdriver with a flat head or Phillips head will be helpful in removing the screws that secure the carburetor cover. A wrench will be required for loosening the carburetor bowl’s screws and the main jet’s bolt. Depending on your snow blower’s model, you might also need a ratchet to remove the carburetor bowl’s screws effectively.
Keep in mind that tools with longer handles will give you better leverage, making it easier to loosen tightly-fitted screws. It’s important to choose the right size of wrench to avoid stripping the screws or bolts, which can make reassembly a real headache. With a properly sized set of screwdrivers, wrenches, and ratchet, you’ll be equipped with everything needed to take apart the carburetor for efficient cleaning.
If you’re looking for the best gas snow blower for your winter needs, look no further. We have compiled a comprehensive list of top-rated models in our article “Best Gas Snow Blower Reviews & Buyer’s Guide“. Whether you’re dealing with heavy snowfall or simply want to make your snow-clearing tasks easier, this guide will help you make an informed decision.
Step-by-Step Guide
Cleaning a snow blower carburetor might sound daunting, but it’s actually a simple and easy process. Here’s a step-by-step guide for cleaning your snow blower carburetor: Firstly, turn off the engine and disconnect the spark plug to ensure safety.
Next, remove the carburetor cover using the required tools. Then, take off the carburetor bowl and carefully detach the main jet using a screwdriver. After that, clean both the bowl and the jet using a carburetor cleaner. Once they are sparkling clean, reattach the main jet and the carburetor bowl.
Finally, reattach the carburetor cover and reconnect the spark plug. Following these steps will significantly improve your snow blower’s performance.
Step 1: Turn Off the Engine
The first and most critical step in cleaning a snow blower carburetor is to ensure that the engine is turned off before proceeding. Failure to turn off the engine can result in injuries, as the snow blower’s moving parts can cause serious harm. To turn off the engine, locate the engine switch and flip it to the “off” position to shut down the engine.
Another way to ensure that the engine is off is to remove the spark plug wire. This will avoid any accidental starting during the cleaning process. It is important to wait until the machine is cooled down completely before you start disassembling the carburetor to avoid getting burned. By properly turning off the engine, you can avoid any potential accidents while cleaning your snow blower carburetor.
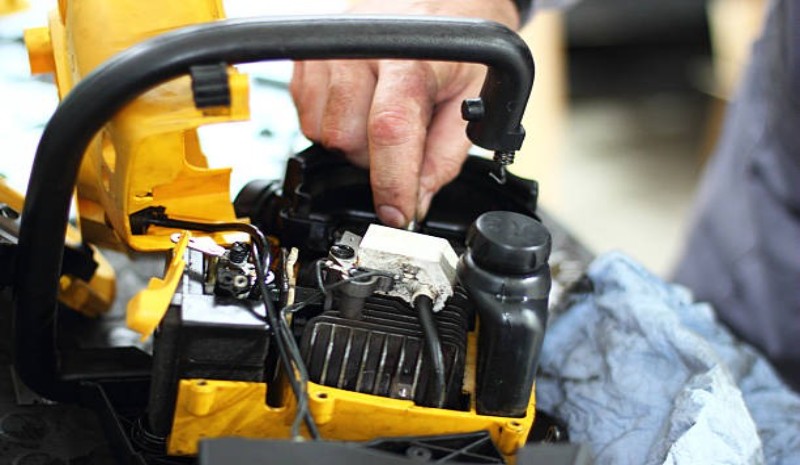
Step 2: Remove the Carburetor Cover
To commence the carburetor cleaning process, move to step 2: Remove the Carburetor Cover. The cover prevents debris from entering the carburetor, and it can be found on the side of the carburetor. Here’s how to remove the carburetor cover:
- Switch off the engine and allow it to cool down completely.
- Locate the carburetor cover on the side of the carburetor.
- Remove the bolts securing the carburetor cover using a screwdriver or a ratchet. Keep the bolts in a secure location to avoid misplacing them.
- Gently pull the carburetor cover away from the carburetor. Be careful not to damage the gasket that’s between the carburetor and the cover.
- Now, you should have access to the carburetor bowl, which is located underneath the cover.
By following these simple steps, you have successfully removed the carburetor cover from your snow blower’s carburetor, and you’re ready to proceed to the next step in the carburetor cleaning process.
Step 3: Remove the Carburetor Bowl
- Locate the carburetor bowl, which is typically located on the bottom of the carburetor, near the fuel line.
- Carefully disconnect the fuel line from the carburetor, using a wrench or pliers if necessary. Make sure to have a bucket or container nearby to catch any fuel that may spill.
- Once the fuel line is disconnected, locate and remove the bolt or screw holding the carburetor bowl in place. You may need to use a ratchet or screwdriver, depending on the model.
- As you remove the bolt, be careful not to lose the gasket that seals the bowl to the carburetor. This will need to be reused later.
- Once the bolt is removed, carefully take off the carburetor bowl and place it aside for cleaning. It is important to be careful during this step not to damage the carburetor or any of its components. Take your time and use the appropriate tools for the job.
With the carburetor bowl removed, you can now move on to the next step in cleaning your snow blower carburetor.
Step 4: Remove the Main Jet
To remove the main jet from the snow blower carburetor, follow these easy steps:
- Identify the location of the main jet by referring to the carburetor’s manual.
- Using a wrench or a ratchet, loosen and remove the main jet. Be careful not to damage the threads while removing it.
- Once the main jet is removed, inspect it for any damages or blockages.
- If there is debris or residue on the jet, clean it off using a carburetor cleaner and a wire brush.
- Make sure to clean the inside of the jet’s hole to ensure full functionality.
- Inspect the jet for any damages one more time before reinstalling it.
That’s it! Removing the main jet might be tricky, but with patience and care, it can be done easily. Remember to keep all the removed parts in a safe and organized place while you proceed with the cleaning process. In the next step, we’ll clean the bowl and main jet thoroughly.
Step 5: Clean the Bowl and Main Jet
To clean the bowl and the main jet, use the carburetor cleaner/aerosol that you gathered in the “What You’ll Need” section. First, spray the cleaner on the bowl and jet to break down the grime and buildup. After a few minutes, take a clean rag and wipe down the bowl and jet, removing any remaining residue. Ensure that there is no remaining cleaner before reassembling the parts.
If needed, use a small brush to remove any debris that might be stuck in the crevices of the bowl and main jet. It’s essential to clean the bowl and jet thoroughly to ensure that there are no blockages that could disrupt your snow blower’s performance.
Step 6: Reinstall the Main Jet and Carburetor Bowl
To install the cleaned main jet and carburetor bowl, place the main jet back in the hole from which it was removed, ensuring that it is secure and screwed tightly. Then, carefully place the carburetor bowl back into position, making sure to line up the notches on the carburetor’s body.
After securing the carburetor bowl, reattach the screws and fasten them tightly. It is crucial to follow the manufacturer’s guidelines when tightening the bowl screws as over-tightening can cause cracks and damage to the carburetor. Verify all the parts are correctly reinstalled before moving to the next step.
Step 7: Reattach the Carburetor Cover
The last step is to reattach the carburetor cover. Make sure to align the cover properly, so it’s flush with the carburetor body. Secure the cover using the screws that you removed in Step 2. Be careful not to overtighten the screws, as this may cause them to strip. Tighten just enough to hold the cover securely in place.
Once you have finished tightening the screws, turn on the snow blower’s engine and let it run for a few minutes. This will allow the carburetor to warm up and ensure that everything is working correctly. Check for any leaks or irregularities before putting the snow blower away. By reattaching the carburetor cover, you have completed the process of cleaning your snow blower carburetor. Your snow blower will now be ready for use and can efficiently clear out snow without any trouble.
If you’re looking for the best single-stage snow blower and need some guidance on how to choose the right one, we have just the resource for you. Check out our comprehensive guide on “Best Single-Stage Snow Blower: How to Choose?” to make an informed decision for your snow-clearing needs.
Tips and Tricks
While cleaning your snow blower carburetor as a part of your regular maintenance, there are a few tips and tricks you can use to keep it running smoothly and avoid future clogging. Firstly, make sure to conduct regular maintenance of your snow blower, especially before and after each winter season. It will help prevent any build-up from accumulating in the carburetor.
Secondly, try to use a fuel stabilizer when refueling. Fuel stabilizers are designed to prevent fuel from going ”stale” or losing its combustibility, thus extending its shelf life. An added bonus of using fuel stabilizers! It helps to keep your engine’s carburetor cleaner and running more smoothly. By following these tips and tricks, you can keep your carburetor cleaner and running efficiently, ensuring smooth operation throughout the winter months.
Tip 1: Regular Maintenance
- Check the Owner’s Manual: Before use, make sure to thoroughly read the owner’s manual. It contains all the necessary information like recommendations for maintenance, scheduled cleaning of parts, etc. for the proper functioning and longevity of your snow blower.
- Inspect and Check Parts Regularly: Always inspect the different parts of your snow blower for wear and tear. Make sure that each part is working optimally. Check the spark plug, cables, belts, and pulleys and oil them regularly to ensure that they run smoothly.
- Clean the Snow Blower After Use: After each use, make sure to clean the entire snow blower to keep it in good condition. Remove all the snow and debris that might get stuck in your blower’s blades and auger. Then, lubricate the moving parts and make sure everything is clean and dry before storage.
- Regularly Change the Oil: A snow blower’s engine oil should typically be changed at least once a year. Used oil gets filled with dirt and debris which can affect the engine’s performance. Regular oil changes will help maintain your snow blower’s engine’s lifespan and performance.
- Keep the Carburetor Clean: As previously stated in this article, it is crucial to keep the carburetor clean to ensure it remains functioning correctly. While cleaning the snow blower, make sure to follow these steps and regularly check the carburetor to avoid any issues.
Regular maintenance is key to keeping your snow blower in tip-top shape and avoiding any costly repairs. By adhering to these tips, you’ll ensure that your snow blower will run efficiently and last longer. Remember that maintenance is the most crucial factor to avoid accidents and breakdowns.
Tip 2: Using Fuel Stabilizer
When storing your snow blower for more than a month, using a fuel stabilizer is an excellent way to preserve the quality of the gasoline in your carburetor. Fuel stabilizers are simple additives that help prevent gasoline from going stale, which can cause significant carburetor problems. This is because when gasoline sits for long periods, it breaks down and can create gum, tar, and varnish in the carburetor, which can lead to clogging and other issues.
However, by adding a fuel stabilizer to your fuel supply, you can keep it fresher for a more extended period, preventing it from spoiling. Fuel stabilizer is easy to use; you only need to mix the stabilizer with your fuel and then add it to your snow blower’s gas tank. A fuel stabilizer can help save your carburetor from severe damage and ensure that your snow blower retains its full functionality the next time you need it, even if it has been stored for an extended period.
If you’re looking for the best snow blower to tackle any site, weather condition, and budget, we highly recommend checking out the comprehensive guide on “Best Snow Blower for Any Site, Weather, and Budget.”
Conclusion
In conclusion, cleaning your snow blower carburetor is an essential part of its maintenance, ensuring that it functions efficiently and has a long life span. By following the step-by-step guide mentioned in this article, you’ll be able to take care of your carburetor and extend its longevity.
Remember to take the necessary precautions, and always wear safety gear such as gloves and safety glasses to avoid any incidents. Moreover, using a fuel stabilizer and maintaining your equipment regularly will prevent residue buildup, making it easier to clean your snow blower carburetor. Keeping your carburetor clean and adequately maintained will allow your snow blower to run smoothly, clearing your path swiftly and easily in times of heavy snowfall.
By investing time into cleaning your carburetor, you’ll be able to minimize the risk of engine damage and save money on potential repairs. In conclusion, remember that a properly cleaned and maintained snow blower carburetor is the key to keeping your equipment running in top condition, making your life easier and safer during the winter season.
Frequently Asked Questions
1. How frequently should the snow blower carburetor be cleaned?
It is recommended that the carburetor should be cleaned at least once a year, before the winter season starts, to ensure that it runs efficiently throughout the entire season.
2. What should you do if you have difficulty removing the carburetor cover?
You can use a penetrating oil or lubricant to loosen up the screws and bolts that are holding the cover in place.
3. Is it necessary to remove the carburetor from the snow blower?
Yes, you need to remove the carburetor to properly clean it. In some cases, you may be able to clean the carburetor without removing it, but it is always best to detach it for thorough cleaning.
4. Can you still use the snow blower if the carburetor is dirty?
It is not recommended to use a snow blower with a dirty carburetor as it can cause the machine to malfunction, consume more fuel, and generate excessive exhaust.
5. Can you clean a snow blower carburetor without a carburetor cleaner?
You can make a carburetor cleaning solution using vinegar and a strong detergent, but it is advisable to use a carburetor cleaner that is specifically designed for this purpose as it is more effective.
6. Can you reuse the old carburetor gasket after cleaning?
It is not recommended to reuse an old gasket as it may not seal properly. It is always best to replace it with a new one.
7. How do you know if the carburetor needs to be cleaned?
If the snow blower is running rough, stalling, or consuming more fuel than usual, it may be an indication that the carburetor needs cleaning.
8. Can a clogged carburetor cause any damage?
Yes, a clogged carburetor can lead to engine damage as it can cause the engine to run lean or rich, leading to overheating or internal damage. It is important to clean the carburetor regularly.
9. Can you clean a snow blower carburetor in freezing temperatures?
No, it is not recommended to clean the carburetor in freezing temperatures as the cleaning solution may not work properly and the parts may get damaged due to freezing.
10. Can you prevent carburetor clogs?
Yes, you can prevent carburetor clogs by using fresh fuel, adding a fuel stabilizer, and performing regular maintenance checks throughout the snow blower season.